You don’t have to search the web for very long to find a web ribbon in the corner of an image. In this quick tip tutorial we will show you how to create your own. Let’s get started!
Tutorial Assets
The following assets were used during the production of this tutorial.
Step 1
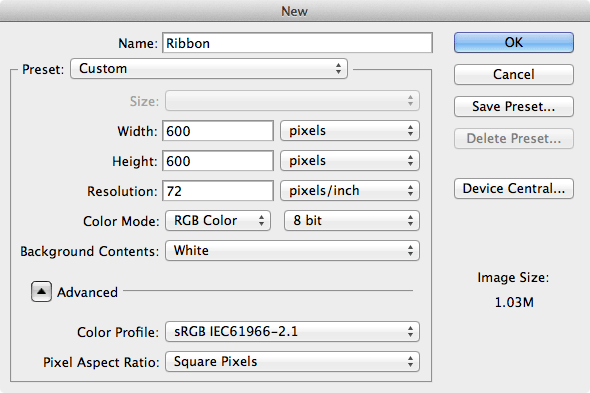
Create a new document and name it “Ribbon”. For this example, we’ll do a 600×600 pixel canvas.
Step 2
Create a new layer and name it “Background Texture”. Now fill it with a light color (I used #cccccc). Now go Filter > Noise > Add Noise and add some noise to the layer to help create some texture. I used the following settings:
- Amount: 10%
- Distribution: Gaussian
- Monochromatic: Checked
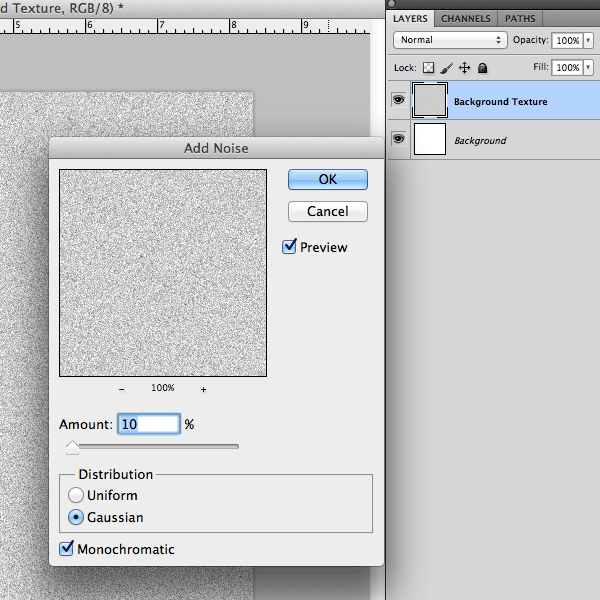
Now set the “Background Texture” layer opacity to 15%
Step 3
Now let’s create the box where our image goes. For this example, I am using the rectangle tool with a fixed dimension of 300×200 pixels.
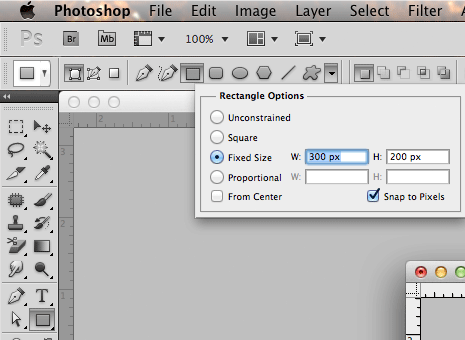
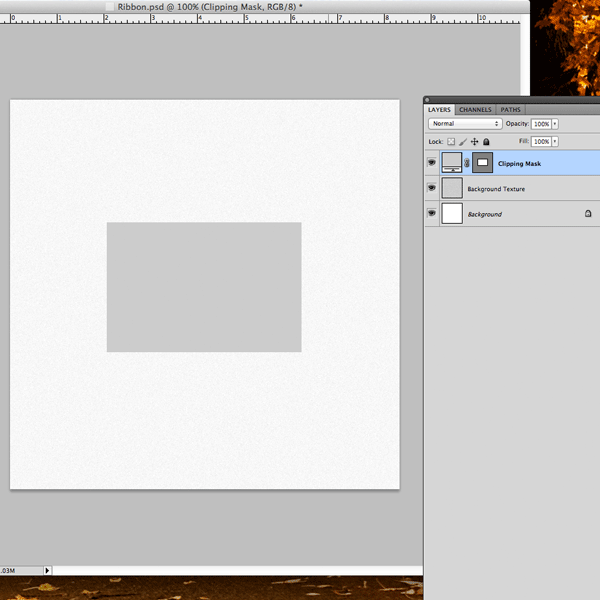
Just place it in the middle of the canvas and name the layer “Clipping Mask”
Step 4
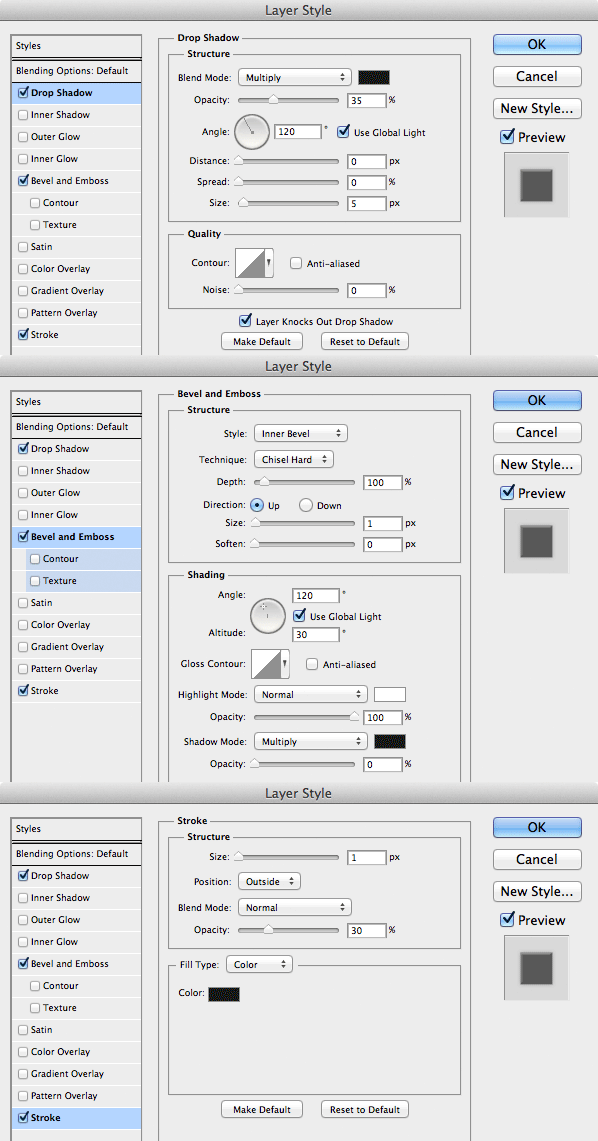
Add the following layer styles to the “Clipping Mask” to give it a nice shadow and outline.
Step 5
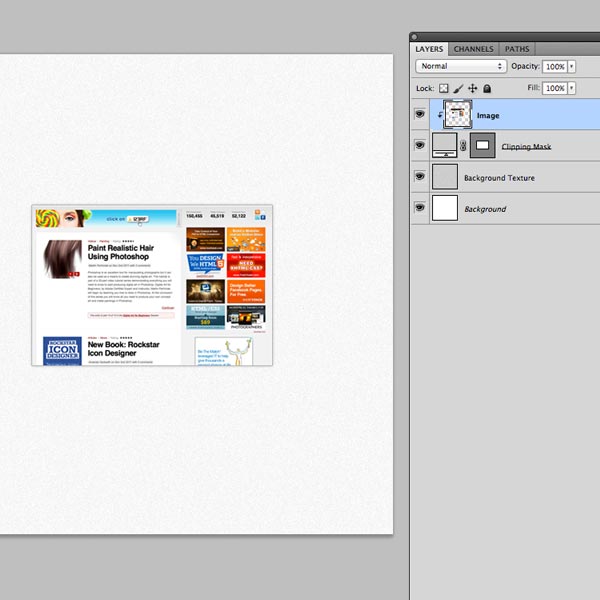
Using whatever image you like (I used the PSD Tuts screenshot) place it in the document, on top of the “Clipping Mask” layer and go to Layer > Create Clipping Mask
Step 6
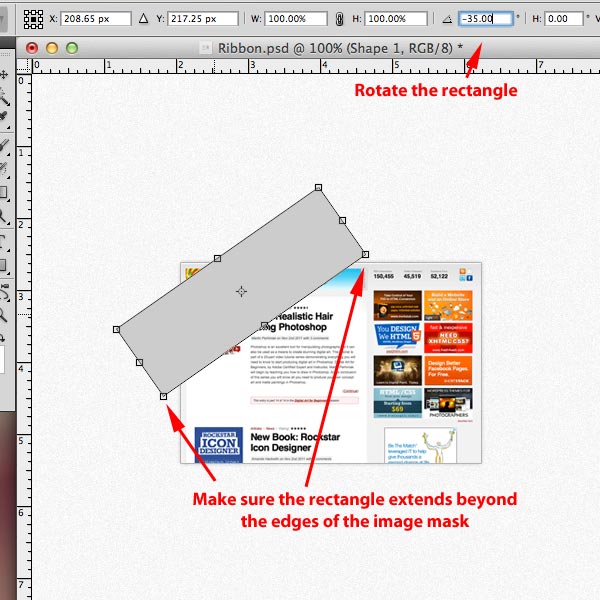
Now we’ve got our image upon which we’ll place our ribbon. Start by using the rectangle tool and draw the ribbon. You’ll then want to rotate it about 35 degrees. Use the free transform tool (keyboard shortcut for free transform (Command/Ctrl + T) or go to Edit > Free Transfrom). Make sure your ribbon’s corners extend beyond the image mask size.
The ribbon color doesn’t matter right now because we’ll set a gradient overlay in the layer settings. Name the layer “Ribbon”.
Step 7
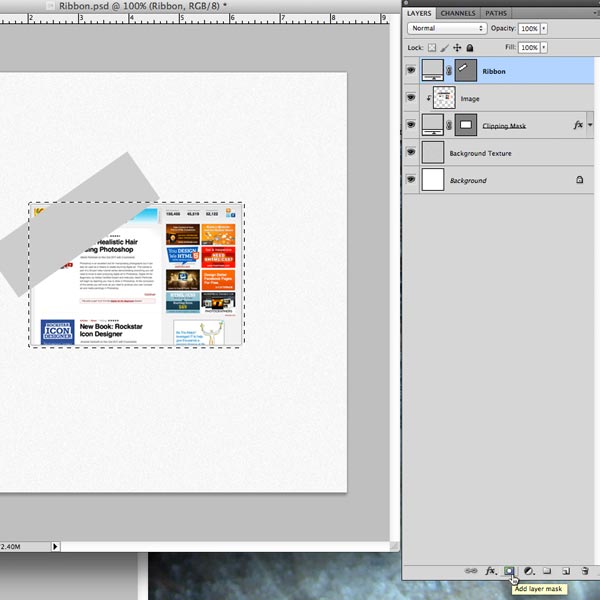
We’re going to make a layer mask for the “Ribbon” layer. This will hide the parts of the ribbon that extend beyond the image. Do the following:
- Command/Ctrl + Click the vector mask of the “Clipping Mask” layer. This will create a scrolling marquee around the clipping mask.
- We want our ribbon to extend slightly beyond the boundaries of the image, so expand the selection by going Select > Modify > Expand and expand the selection by about 4 pixels.
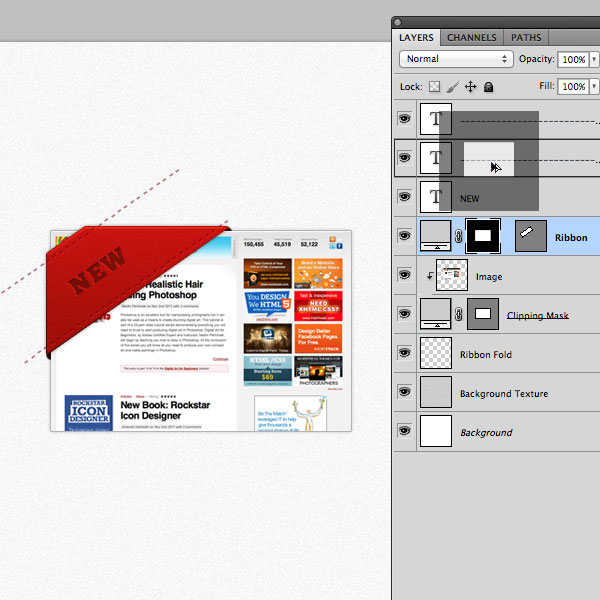
- With your current selection, choose the “Ribbon” layer and create a layer mask. You can do this one of two ways:
- Layer > Layer Mask > Reveal Selection
- Click the “Add Layer Mask” at the bottom of the Layers panel (see image)
Step 8
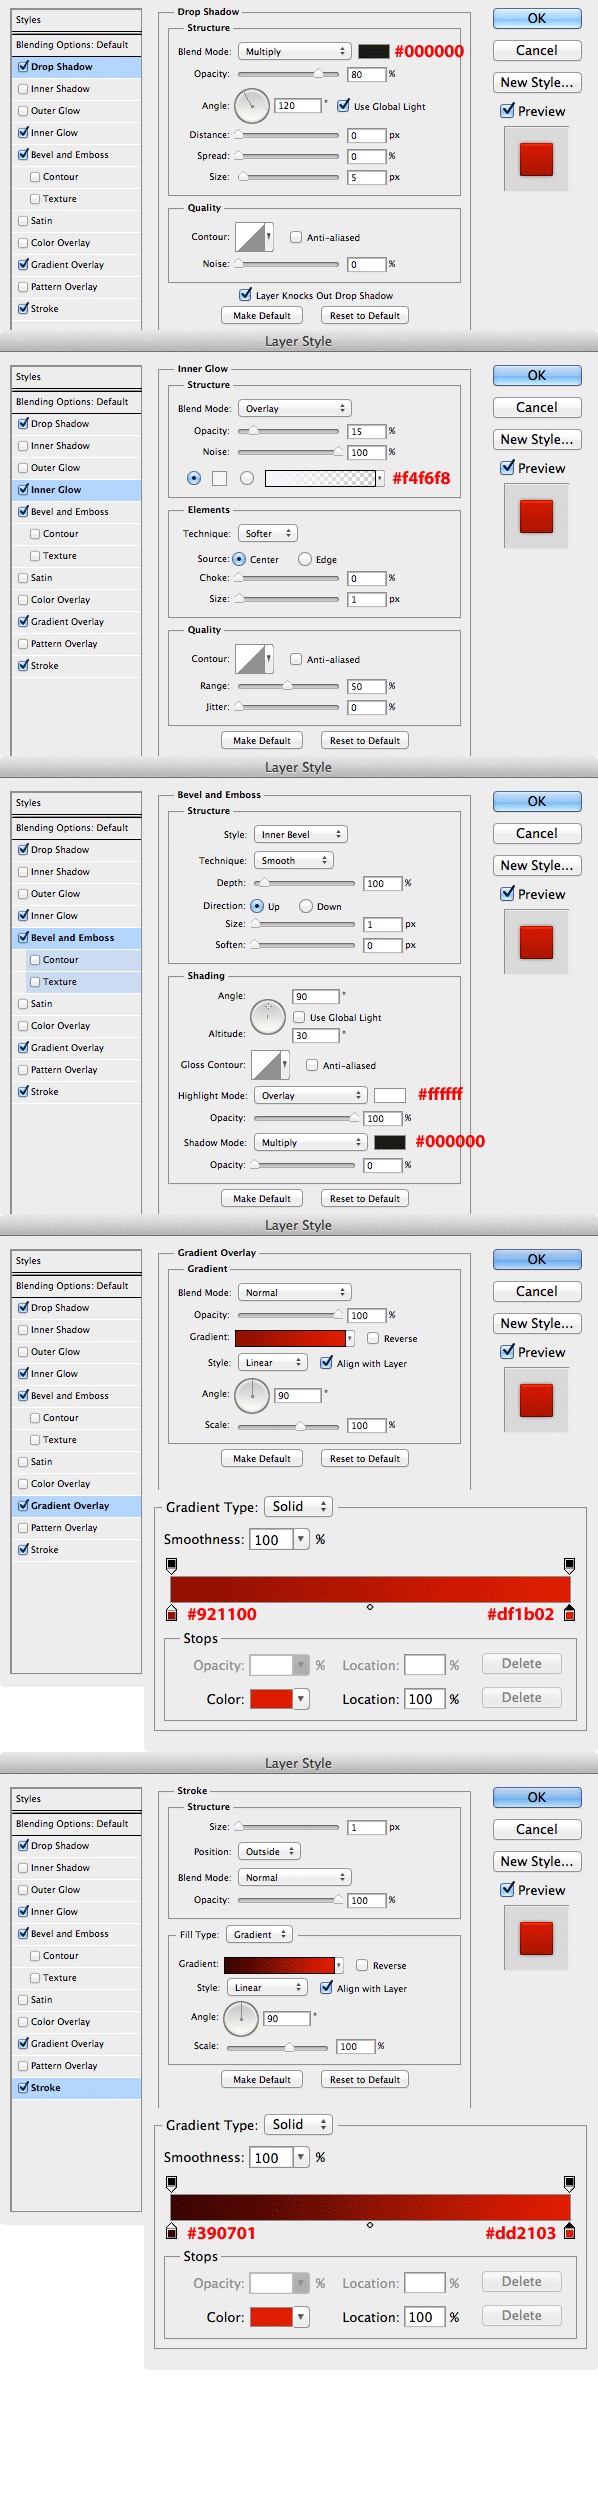
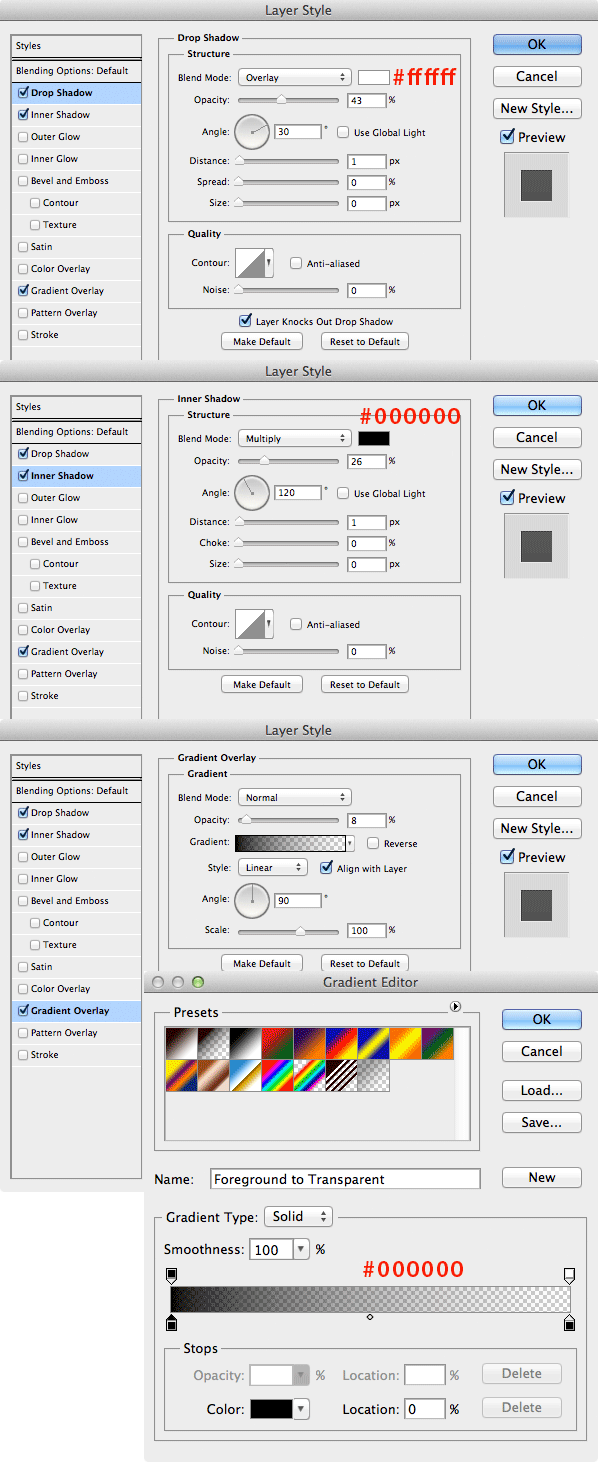
Let’s apply some layer styles to our ribbon shape. These styles help give our ribbons some shadows, highlights, and texture to improve it’s look. We’ll apply the following:
- Drop Shadow (outer shadow)
- Inner Glow (texture)
- Bevel and Emboss (edge highlights)
- Gradient Overlay (ribbon coloring)
- Stroke (help define the outer edge of the ribbon)
We now have something that looks like this:

Step 9
No we want to create the folds in the ribbon. Remember how we made sure the Ribbon expanded beyond the image’s edges by about 4 pixels? This is where we will add the fold in the ribbon, as if it is bending behind the image.
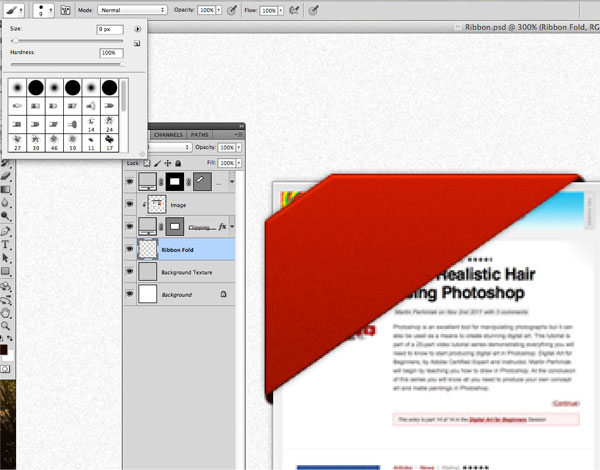
- Create a new layer called “Ribbon Fold” and place it above the “Background Texture” and below the “Clipping Mask”
- Select a dark color for the foreground color (I used #240500)
- Select the brush tool adjust the settings to a small sized brush (about 9px) with 100% hardness.
Now use the brush to paint a small circle on both of the bottom edges. Because the layer is below the clipping mask, you’ll only see the dark part of the brush around the ribbon corners that overlap the image.
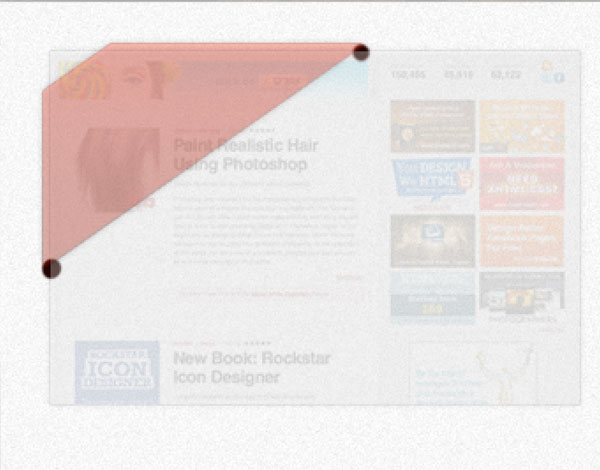
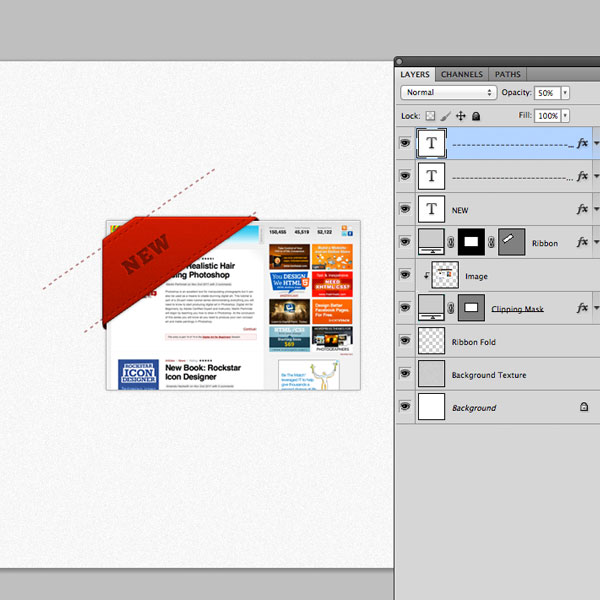
To help illustrate this point, look at the image below. This is what our PSD would look like if we turned down the opacity on all the layers above the “Ribbon Fold” where we painted with our brush.
Step 10
Let’s add our text. I used the following:
- Chunk Five
- 24pt
- 75 letter spacing
- Color #240500
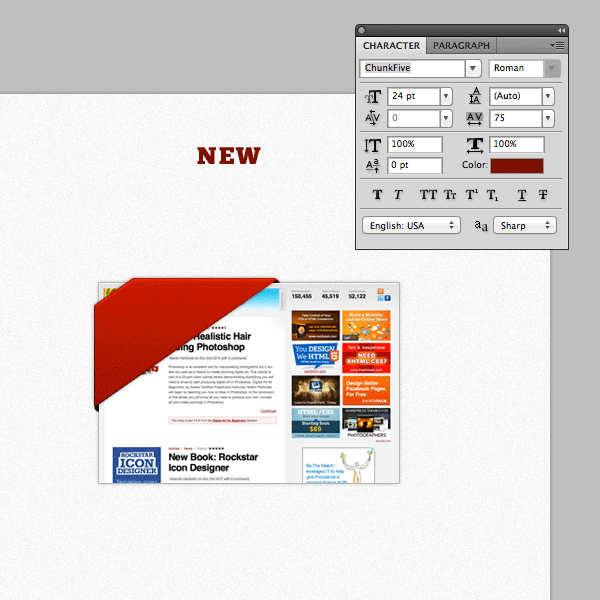
Place the text on your ribbon and rotate it 35 degrees (using the Transform tool as we did with the ribbon shape in step #6)
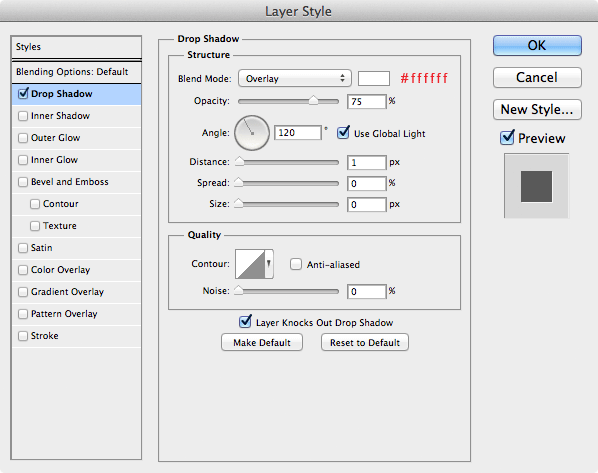
Now let’s add some layer styles to make our text appear indented on the ribbon.
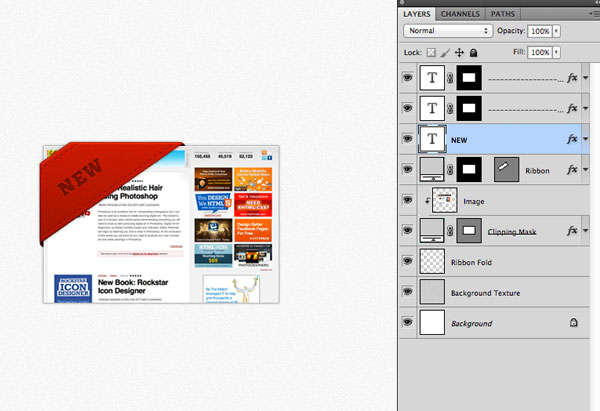
Now you should have something that looks like this:
Step 11
Finally we’ll add the stitching to our ribbon. Grab the text tool and type a bunch of hyphens. Then change the character settings as follow:
- Chunk Five
- 13pt
- 200 letter spacing
- Color #700404
- Text Layer Opacity: 50%
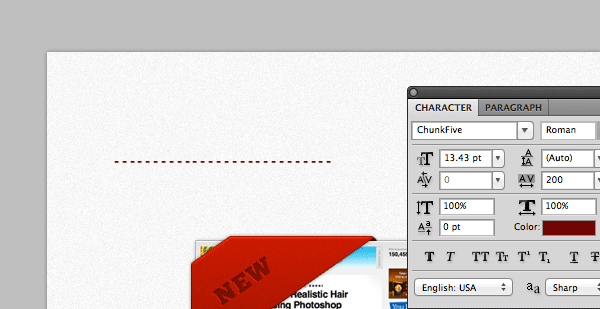
Place the text on your ribbon and rotate it 35 degrees (using the Transform tool as we did with the ribbon shape in steps #6 and #10). Now let’s add some layer styles to make our stitching appear more realistic.
Duplicate that text and move it down to the bottom edge of the ribbon. Now you should have something that looks like this:
Step 12
The last thing we need to do is apply a layer mask to our stitching so it doesn’t go beyond the image’s edges. To do this, simply duplicate the layer mask on the “Ribbon” layer and move it to the new text hyphen (stitching) layer.
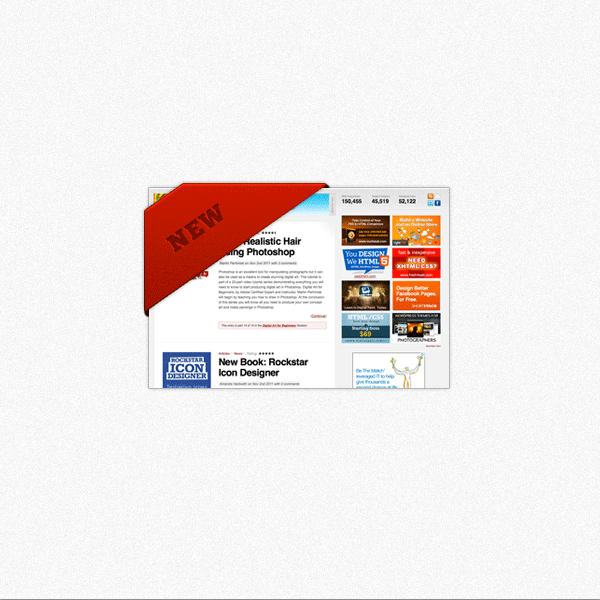
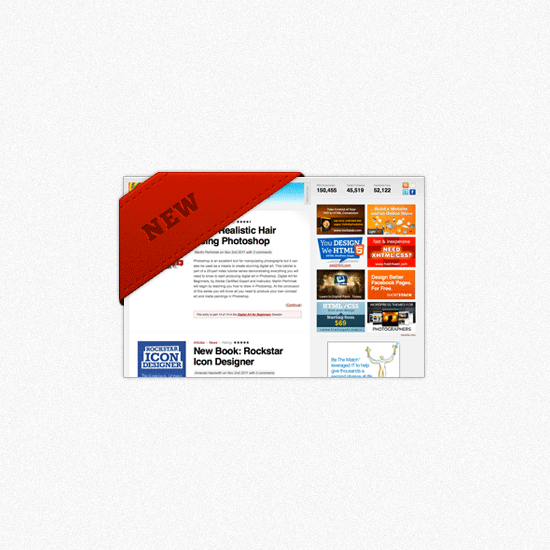
Apply the effect to both stitching layers and that’s it! You should now have something like this:
Final Image
That’s it! Now you know how to make a simple ribbon in Photoshop. You could play around with other options like changing the colors. Or, you could try making rounded edges on the ribbon where it crosses the image. That could be accomplished by using a combination of the pen tool and the existing layer masks. Good luck!
0 件のコメント:
コメントを投稿